

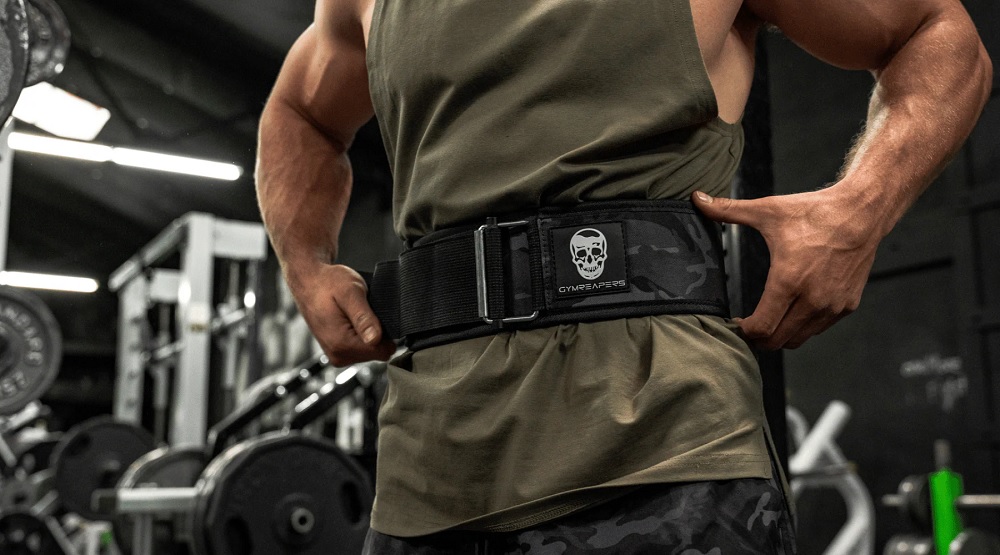
Heavy training feels different when support moves with your body
A lifting belt often gets judged before the first working set. It may look sturdy, feel firm, and close tightly around the waist. Yet the real test begins when the lifter braces, bends, and moves beneath a loaded bar. A belt that pinches the ribs or digs into the hips can quickly become a distraction. We created this guide for lifters who want support without feeling trapped by their equipment. Better training comfort can be achieved with a comfortable weightlifting belt chosen for body shape, lifting style, adjustment needs, and personal preference. The right belt should support bracing while allowing the athlete to move with control.
This guide covers fit, placement, tightness, breathing, and care. We will explain why the widest or stiffest option is not always the most useful choice. Squats, deadlifts, presses, and functional movements can place the torso in different positions. A belt that feels natural during one lift may need a small adjustment for another. Comfort also depends on how the belt edges sit against the ribs and hips. No belt replaces sound technique or gradual training. Its role is to help the lifter create steady pressure and maintain a strong position during demanding sets.
What fit details make a lifting belt easier to wear
A good belt should match the lifter rather than force the lifter to adapt to it. Start by checking the size range against the waist area where the belt will sit. Do not rely only on regular pants sizing. Measure the torso while standing naturally and follow the maker’s sizing method. The belt should close with room for adjustment in both directions. This leaves space for changes in clothing, body weight, and placement.
Look for these practical fit details
- Edges that do not press sharply into the ribs
- Enough adjustment for different training days
- A width suited to the length of the torso
- Secure closure without unwanted shifting
- Support that feels even around the waist
Try several bracing breaths after putting the belt on; Bend, hinge, and squat without weight. If the belt folds, slides, or causes sharp pressure, change its position or size. A stable fit should feel supportive before the bar becomes heavy.
How should belt position and tightness change for each lift
The belt does not need to sit in the same place for every movement. Small changes can improve comfort and bracing.
- Find the natural space between ribs and hips
Place the belt where it avoids direct contact with bone. Some lifters prefer it slightly higher for squats. Others move it lower for deadlifts.
- Leave room for a full breath
A belt should feel firm, not crushing. The lifter must still inhale deeply into the abdomen and sides. Excessive tightness may limit the brace rather than improve it.
- Test the position with light weight
Use warm-up sets to check comfort. Notice whether the belt shifts at the bottom of a squat or during a hinge. Make small adjustments before adding load.
- Keep the setup repeatable
Once a useful position is found, remember it. Marking the preferred closure point can save time. A repeatable setup helps the lifter focus on the movement.
Why does breathing technique matter more than belt stiffness
A belt provides a surface for the torso to press against. It does not create the brace on its own. The lifter must inhale deeply and expand the abdomen, sides, and lower back. This creates pressure around the trunk instead of only pushing the stomach forward. The brace should remain steady through the hardest part of the lift. Exhaling too early may reduce support before the repetition is complete.
Practice these habits with lighter loads
- Breathe low into the torso before each repetition
- Expand against the full belt rather than one point
- Hold the brace through the demanding movement range
- Reset breathing between repetitions when needed
- Stop when dizziness or pain appears
Technique practice should happen before heavy attempts. A coach can help identify poor breathing or belt placement. The goal is not to depend on the belt for every exercise. It is to use it with purpose when added support benefits the session.
What care habits help a lifting belt stay ready for training
Sweat, chalk, and repeated folding can shorten the useful life of training gear. After each session, allow the belt to dry before placing it in a closed gym bag. Wipe the surface according to the care instructions. Check the closure, stitching, edges, and support panels for damage. Do not keep using a belt that opens unexpectedly or has weakened parts. Store it in a position that avoids deep creases.
Simple care steps include
- Air-dry the belt after hard sessions
- Remove chalk and sweat residue
- Inspect closures and seams often
- Avoid harsh cleaners or direct heat
- Replace damaged equipment before heavy use
A quick check takes little time. It also helps the belt perform consistently when the training load increases.
The Right Belt Supports Your Lift Without Becoming a Distraction
A useful lifting belt should help the athlete brace confidently while moving without sharp pressure or distraction. We should choose the correct size, test the fit, adjust the tightness, and practice sound breathing before lifting heavy weights. Comfort does not mean loose or weak support. It means the equipment works with the body and the demands of the movement. Begin with lighter sets, notice what feels stable, and refine the setup patiently. When the belt fades into the background and the lift receives full attention, the fit is likely doing its job.